How to Install and Configure VoiceChat
This tutorial will guide you step-by-step to install and configure VoiceChat on your Minecraft server hosted at XeroHost.
Step 1: Access the XeroHost Panel
- Log in to the XeroHost control panel: https://panel.xerohost.net.
- Select your Minecraft server.
Step 2: Assign an additional port
For VoiceChat to work correctly, you need a additional port.
- In the left menu, go to Network.
- Click on Create Allocation.
- A new port will be generated automatically.
- In the Notes column, you can write “VoiceChat” to identify it (optional).
Step 3: Install the VoiceChat Mod/Plugin
VoiceChat is available as a mod for Minecraft Forge/Fabric and as a plugin for Paper/Spigot or Proxy. Make sure to download the correct version for your server.
- Go to the Files section in the XeroHost panel.
- Open the mods folder (if your server uses Forge/Fabric) or the plugins folder (if your server uses Paper/Spigot or Proxy).
- Download the file from the official website:
- For the Mod (Forge/NeoForge/Fabric/Quilt): https://modrinth.com/plugin/simple-voice-chat/
- For the Plugin (Paper/Spigot): https://modrinth.com/plugin/simple-voice-chat/
- For the Proxy (Velocity/BungeeCord): https://modrinth.com/plugin/simple-voice-chat/
- Upload the .jar file of the mod or plugin to the corresponding folder.
Important: Make sure the mod/plugin or proxy version is compatible with your Minecraft server version.
Step 4: Configure VoiceChat
- In Files, open the plugins > voicechat folder.
- Find the
voicechat-server.propertiesfile and edit it. - Modify the line
port=25565and replace it with the additional port you generated in Step 2.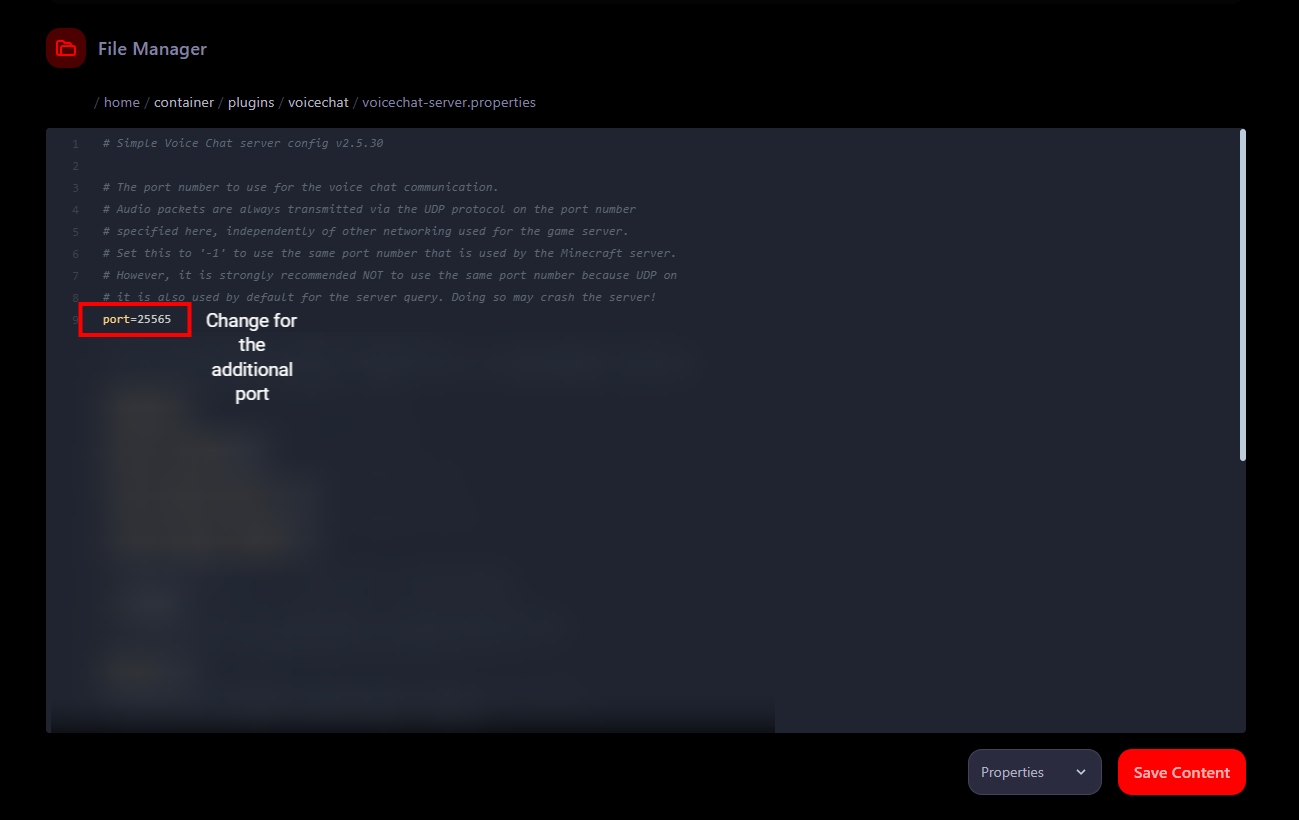
- Save the changes and restart the server.
Step 5: Connect and Test VoiceChat
- Players must install the VoiceChat mod on their Minecraft client. They can download it from the same Modrinth or CurseForge link mentioned previously for the mod version.
- Once on the server, press the V key to open the mod menu.
- Configure your microphone and adjust the volume.
- You can now talk with other players in the game in real time!
Troubleshooting
❌ Voice chat is not working
- Make sure the mod/plugin is installed on the server and the mod is installed on the clients.
- Verify that the additional port is correctly assigned in the VoiceChat configuration and in XeroHost.
❌ Connection error
- Check that the additional port is open in the XeroHost network configuration.
- Restart the server after making any configuration changes.


