How to Connect via SFTP with FileZilla
This tutorial will guide you step-by-step to connect to your XeroHost server via SFTP using FileZilla.
Step 1: Download and Install FileZilla
If you don't have FileZilla yet, download it from its official website:
| Platform | Download Link |
| Windows | ⬇️ Download |
| Linux | ⬇️ Download |
| Mac | ⬇️ Download |
| Mac (arm64) | ⬇️ Download |
Install it on your computer and open it.
Step 2: Get your SFTP credentials
- Access the XeroHost panel: https://panel.xerohost.net
- Select your server that you want to access via SFTP.
- In the left menu, click on Settings.
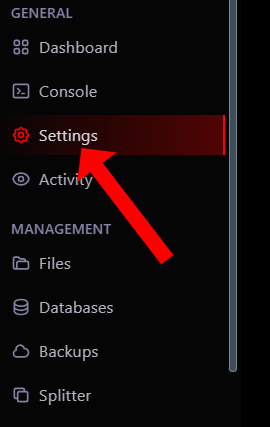
- In the SFTP Details section, you will find the following data:
- Server Address
- Username

Note: Your SFTP password is the same one you use to log in to the panel.
Step 3: Configure FileZilla
- Open FileZilla and at the top, you will see the following fields:
- Host: Type the SFTP address (Example:
sftp://us1.apple.xerohost.net:2022). - Username: Copy your SFTP username from the panel.
- Password: Enter the same password as your XeroHost panel.
- Port: Specify
2022.
- Host: Type the SFTP address (Example:
- Click on Quickconnect.
![]()
If everything is correct, FileZilla will display a list of your server's files and folders.
Step 4: Manage Files
Now you can:
✅ Upload files: Drag files from your PC to the right side of FileZilla.
✅ Download files: Right-click a file on the server and select Download.
✅ Delete files: Select a file and press Delete.
Troubleshooting
❌ Connection error:
- Verify that you have correctly entered the Server address, username, password, and port 2022.
- Make sure your password is the same one you use to enter the XeroHost panel.
- If you continue to have problems, contact XeroHost support.


